Saturday, May 3, 2014

How To Hang A Gallery Wall For Next To Nothing

One trend that we've been seeing a lot of lately is the gallery wall.  Reason being, simply stated, because they are FABULOUS. They fit in any space, any design aesthetic, and it wouldn't be us if we didn't mention; any budget. A wonderful way to fill a large wall without having to purchase large pieces of art, gallery walls are the perfect way to update any room and the options are endless! 
See?! This is why we can't get enough of them! Fabulous examples from Top left: Architectural Digest, top right: Southern Living, bottom left: Liz Marie Blog, and bottom right: Emily A. Clark
Another wonderful advantage to this trend is the fact that you can change, and improve them gradually; replacing old pieces with new, updating outdated photographs, and even expanding and adding on with time, and as budget allows. And they are PERFECT for indecisive people (such as myself). Can't settle on one piece for that main living room wall? No problem-try ten!
With so many pieces working together to create one final product though, it can be a little intimidating knowing where to begin. Achieving balance can be a challenge, so mapping them out properly is crucial. To make the task a little less daunting, we've put together an easy 3-step guide to implementing this stylish trend in your home. 

The first step is to determine the space you have to work with. You'll want to figure out the size of the wall(s) you will be working on, if you want things to be spaced out or clustered together, and approximately how many items you will need to fill that space. For me, I knew I wanted something to fill the relatively small wall behind my kitchen table. So, got the long roll of paper that my wonderful grandfather made for me as a kid and rolled out three very long sheets to fit the size of the wall I was wanting to fill (multiple pieces of computer paper or even posterboard would also work), and just scotch taped them together. This would give me a general guideline for scale while laying out my wall.  
If you lack inspiration on how to properly utilize the space on your wall, have no fear! There are plenty of awesome guidelines online, like these ones from Hubpages (left), and The Sun Shines Blue (right).
 

Then you'll need to gather pieces you would like to feature in your gallery wall. This can be the fun part, but finding an assortment of individual pieces can be incredibly challenging if you are looking to keep things affordable. When you are using multiple pieces on one wall, things tend to add up fast! I knew I wanted to do a collage on my wall, however, I also knew that I did not have the budget to do so. I decided not to let that stop me (I've never been good at being told no anyways!); I would just have to do what I do best-fake it 'till I make it! So I hit my favorite thrift store; one nearby that does all you can fit in a cart for $10 one day a week! It can get pretty packed on these "cart sale" days, so things get picked over fairly fast (not to mention a little competitive and sometimes downright scary!), so I didn't have cream of the crop choices but I was on a mission! One thing they did have a surplus of were aged wood frames. These would do just fine! My kitchen is by far the "girliest" room in my house (floral table cloth, frilly antiques, flowers on the windowsill-the whole nine yards!), so the aged wood would flow with the vintage feel, and the brown color of the frames introduced a nice neutral in my otherwise brightly decorated room, and allowed for me to fill the frames with bright pieces without the whole thing becoming overwhelming. Amazingly, I was able to pick up all of the frames I needed for my wall in one trip (along with a cart packed full of other great finds), and spent next to nothing.


Once I had all of my frames together, I laid them on the floor on top of my guide for the wall, moving them around until I found an arrangement that was balanced in both the finish on the wood, and the size and shape of the frames. When I was happy with the composition, I took a marker and carefully outlined each frame where it laid on the paper.
You will not want to hang each piece one at a time. The pounding of the nails for the next frames you hang can cause the pieces to fall off of the wall (I may or may not have found this out the hard way). So since I needed all of the nails to go into the wall before I actually started hanging the frames, I then drew a tiny dot in each shape that directly lined up with where the nail would need to be in order for the frame to hang in its outline. 
Then, I taped it flush to the wall in the exact position I wanted my collage to hang.  


I hammered nails exactly into the dots in each shape (through the paper), and in a matter of minutes I had all of the nails hung. Then I just ripped the sheet of paper down, leaving the nails in place and the wall ready to start coming together.
Since I had the same budget for filling the frames as I did acquiring them, I kept my eye out at the cart sale for things I could use. I found the clock in the center (which was a little obnoxious at first but as you'll learn there is NOTHING that spray paint can't fix!), along with the dried flowers in the small barnwood frame to the center right, and a children's book with illustrations of woodland creatures and flowers that I was able to cut pictures out of. The rest of the things I found by shopping my house. Fabric scraps make wonderful fillers for picture frames, or backing for pictures. Most frames contain a cardboard insert cut to the exact size of the frame, which fabric can be fit to, or that can be painted and either used alone, or as the backing for a smaller picture, eliminating expensive matting costs. Also, there is an abundance of free graphics online that are absolutely wonderful, and with resources like pinterest, even easier to find than ever! Even if you don't have a printer (like me!), they can be printed very affordably in a number of sizes at any local store with a photo department. 

Eventually I would love to be able to transition my gallery wall into being a little more polished and modern, like some of the above examples. I plan on adding and updating pictures and frames with time, and as I can afford to. For the time being though, I was able to get one assembled for almost no money out of my pocket, which was the only way I would be able to make it work. And as I mentioned before, one of the biggest perks is that they can be updated gradually, growing and ever-evolving, like our homes and lives should always be.


Tuesday, April 29, 2014

Tip Tuesday


Hello friends! Welcome to Tip Tuesday where we share a tip or trick that we love. Some weeks it might be a kitchen tip, other weeks a home decor tip or an organizing tip.....anything we've found that's made our lives easier. How fun is that?

This weeks tip is a Pinterest fave! Seriously, I think Pinterest makes me better! Hear me out on this one. Yes, sometimes it can be overwhelming to see perfectly decorated homes with what looks like an unlimited budget, someone else's perfectly dressed and behaved children playing quietly with the homemade toy mom just "whipped up" this morning, the lavish breakfast spread to celebrate Groundhog day (doesn't everyone celebrate Groundhog day?). It can be a bit discouraging and sometimes feels like a reminder of all the things we're NOT doing. However, I have found a lot of things on Pinterest that have made my life easier. I try more new recipes. I've found beautiful, free printables for my home. I've read quotes that were just what I needed to hear. I've started more meaningful traditions and found out what works and what doesn't work from other families similar to mine. The trick is to take away what benefits you and not worry about the rest.

Today's tip is one of those where-have-you-been-all-my-life tricks. One of those I-could-kiss-you-on-the-mouth kind of tips. Life changing. I used to dread shredding chicken (and pork) and my arms feel like jello even thinking about it. But not anymore! Introducing........


Many of you may have already seen this on Pinterest but if you haven't seen it or haven't tried it yet, I am here to tell you that you need this in your life. IT WORKS! In seconds flat.

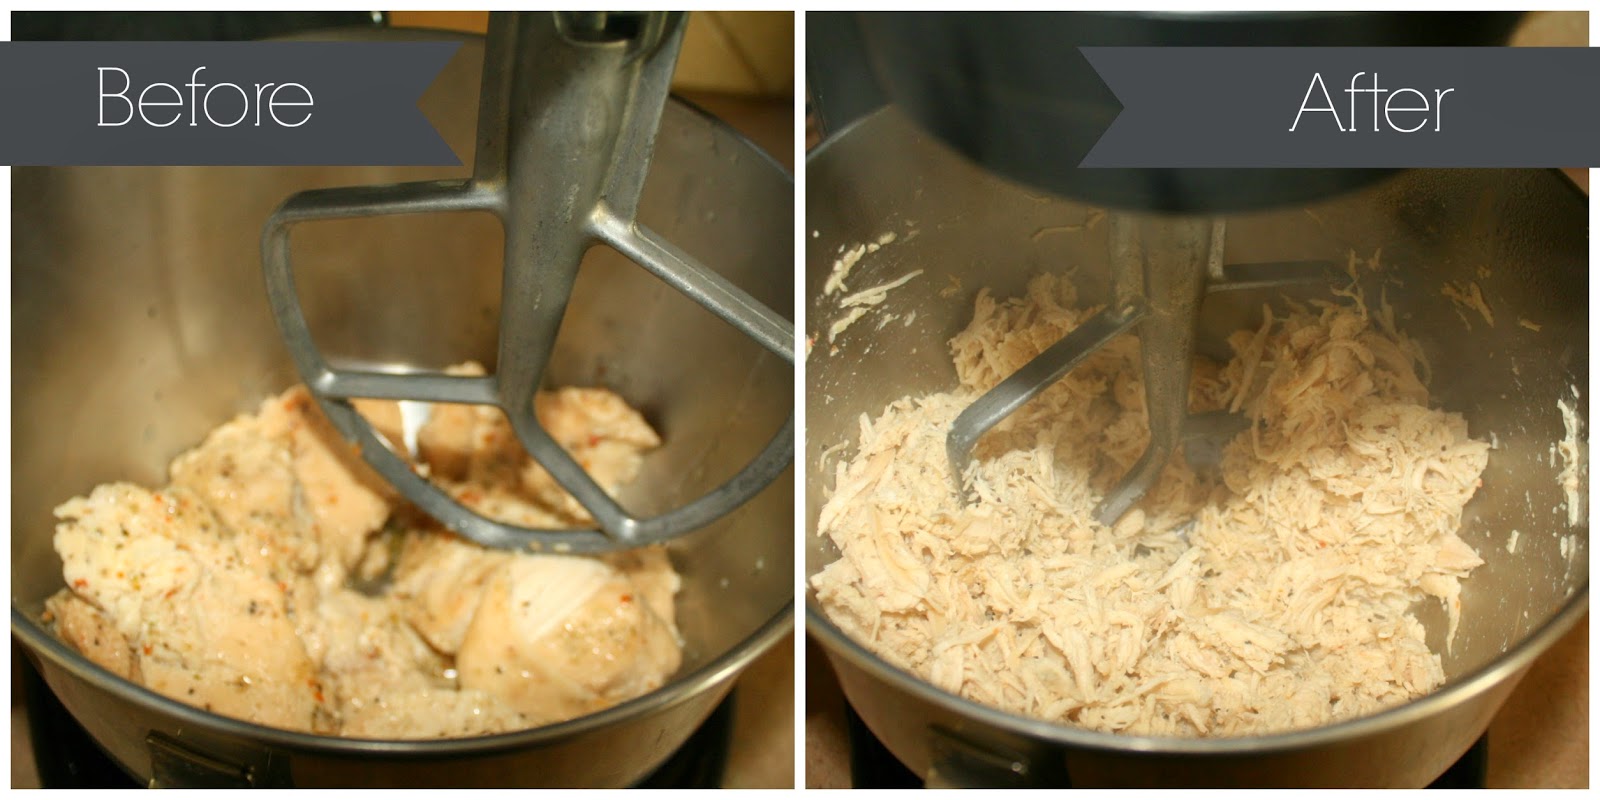
If you have a Kitchen Aid with a paddle attachment, you're in business! Cook your chicken as you normally would for the recipe you are preparing. While the chicken is still hot (this is important), place it in your Kitchen Aid with the paddle attachment.


Start your mixer on low, slowly increasing your speed to medium. I could try to drag this post out by giving you some other invaluable tidbit about this process, but really......that's it. Beat for approximately 30 seconds on medium speed.


Voila! The only real tricks are to shred while the meat is still hot (notice the steam in the above photo) and to watch your speed or else you will have shredded chicken in your hair. Don't ask me how I know. It may or may not go everywhere if you turn your mixer speed too high.

And there you have it. Perfectly shredded chicken in 30 seconds using your Kitchen Aid!


As I said before, I have also used this for shredded pork for homemade Cafe Rio Pork Barbacoa. It works just as effortlessly.


So thank you world of Pinterest for making my life so much easier!

Do you love Pinterest or does it make you feel inferior?

What have you found on Pinterest or elsewhere that makes your life easier? We'd love to hear from you in the comments!


Friday, April 25, 2014

Entertainment Center Makeover - Paper Backed Shelves


Faux Wood Backed Entertainment Center


I have had a major urge to lighten up my home and bring a little bit of Spring inside. My entertainment center is a dark espresso color with deep cabinets and I felt like much of my decor got lost on it. I really wanted to give the shelves some depth and make my decor pop. Cue the singing angels when the heavens parted and I came across this lovely faux wood paper at Hobby Lobby. This was just what I was looking for to transform  the back panel of my dark and drab entertainment center! I love how it brightens up the room and that when I decide I'm ready for a change, I can just take it right back down again! Do I have your attention? Read on to learn all the details of this easy afternoon DIY project!


Let's start with a little before picture, shall we?


Not hideous or anything but dark and B.O.R.I.N.G. (Excuse the glare. SO hard to take a picture without it.)

And here my friends is the after.......


Okay, in full disclosure I must admit there may be a few new pieces of decor on the shelves in the after photo. Just a few. The decor has always been a hodge podge of thrift store finds and make-do kind of items, so I hit my local thrift store and added a few pieces to finish it off a bit while still staying in budget. It's still not perfect. I need to find just the right pot for my little plant on the right. But it's okay because I saved so much on the makeover! ;)


This is a very easy project and you may be able to skip the tutorial and move right on to the pretty pictures and still get the idea. However, if you're one who likes a detailed tutorial, read on to learn how to make this magic happen. Let's get started.....


The first step is to look for paper you would like to use in your project. As I mentioned before, I chose a fantastic faux wood paper carried at Hobby Lobby. It is thick & sturdy, has a nice matte sheen that will not cause a glare, and comes in a 4ft x 12ft roll. It was so nice and large I only used one roll for the entire project. Go me!

Sidenote: If you want to look around for other types of papers I have some suggestions for you.
Tip #1 Look for traditional wrapping paper. I have seen fantastic geometric patterned wrapping paper in the Dollar Spot at Target that would look lovely on a cabinet, but sadly there were none at the time I got the urge to do this little project. I also love to buy my gift wrap at Home Goods for $2.99 a roll. They usually carry bright fun patterns that follow current trends. Just keep in mind this paper may be thinner, shinier and may differ in width and have less paper per roll lengthwise than the large roll at Hobby Lobby. Tip #2: You could look at places like Dollar Tree for shelf liner. I have found some really cute patterned shelf liner at Dollar Tree but it was never quite right for the colors or style in my room, but you may find something you love! They even had a faux wood liner recently when I went in but it was more of an oak or pine look and not the weathered wood I was looking for. If you're not as picky as I am or oak matches your home, you may find a roll that's just right for you for only a dollar! AND with it's own sticky back! Score!

However, if you decide to go the same route as I did, get the Hobby Lobby app on your phone or print up a 40% off coupon off their website and buy one of these babies. At $5.39 after coupon, you will not be sad you did. This my friends, is what you want to look for.......


You will find this lovely paper in the hobby section of Hobby Lobby across from large rolls of photography backgrounds (and interestingly enough, the faux wood photography background was $4 more for almost the same thing.....go figure).

Now lets take a look at our other supplies:


Once you have your paper, you will need:


  1. Poster Board or cardboard - I will be honest because we're besties and tell you that 90% of what I used was free cardboard that had been given to me and was just sitting out in our garage. I was a tad short, so I bought one Tri-Fold display board from the dollar store (seen in the lovely photo above).
  2. Measuring tape - to measure your cabinets and the distance between your shelves. You will also use this later to mark your paper (if you do not have an edge ruler mentioned below).
  3. Exacto Knife - Once you have measured your shelves and marked off your cardboard, you will need your exacto knife to cut your cardboard pieces to fit.
  4. Scissors -  Once your paper has been measured and marked off, you will need to cut your paper with your scissors. Be sure to allow a slight overhang for wrapping around the pieces of cardboard.
  5. Scotch Tape - Another honest disclosure here. I think it would be wise and easiest to use double stick tape for this project but alas our roll had disappeared when it hit go time and well....frankly I'm just too impatient to go to the store and wanted to get started. Regular scotch tape worked fine.
  6. Glue Stick - In all honestly, this was grasping at straws and would not be needed if I had the double stick tape (I'll explain later).
  7. Edge Ruler (optional) - Although this didn't make it into the photo above, I used an edge ruler to measure and mark my cardboard (see photo below).

Step by step instructions:

1.) Measure the height and width of each shelf back. Most of my shelves were removable, so I removed all the ones that I could to give myself the least amount of cuts. Mark off each measurement on your cardboard and cut. I moved my edge ruler every few inches and made another mark, then connected the marks with my straight edge.


2. Test your cut piece in the space to make sure it fits correctly. Results are best when the cardboard is a tight fit. I trimmed a piece that was a little too big and now it is slightly too small. The slight gap is visible if you look close and it grates on my OCD. Tip: I did however learn the hard way to not just stick that baby in there when testing size without a way to get it out. See exhibit A:


Do you see a gap where one could fit their finger (or even fingernail) to remove said cardboard? No. me neither. Great fit = mangling your piece of cardboard to get it out. I may or may not know that from experience. SO, I designed this very complex cardboard removal system:


Yeah, when my crazy life from being a famous blogger dies down, I may just have to patent this thing. In the meantime, feel free to use at your leisure. Your're welcome. 

3.) Mark your height and width on your paper and add an additional 2 inches or more extra on each side to wrap the paper around the cardboard. I drew arrows to show which direction faced up to save time when fitting into place (see photo below).


4.) Tightly wrap your paper around your cut piece of cardboard. This is where double stick tape would've been lovely. Since I was too impatient to make a trip to the store, I used my glue stick. I applied a small amount every 6 inches or so then pulled the paper tightly and smoothed it out with my ghetto tool (also not pictured in photo above).....


Yeah, that's a very well loved paint guard. You're welcome again. It really did work to smooth the paper out and over the glued areas to keep the paper tight. Again, with double stick tape placed every few inches this step likely wouldn't have been necessary. See how we like to teach you not only what to do, but what not to do? Besties do that for one another.


This is a finished section. Easy Peasy! Now rinse and repeat!


5.) Place all your covered cardboard pieces in place and stand back and admire your work!


6.) Now for the fun part......Accessorize!!! 


Now let's inundate you with photos, shall we? Enjoy.


Not bad for under $10 right?

So what do you think? What are you doing to brighten up your home and bring a little Spring inside? We'd love to hear from you in the comments and be sure to follow us on Facebook, Twitter and Instagram for updates, tips and sneak peaks.


Monday, April 21, 2014

Meet Us


We are Colleen & Brianna; a mother/daughter duo who love DIY, decor and all things lovely. We love a good thrift store find, re-purposing old belongings into new treasures, a fabulously modern remodel, and everything in between! Stay with us and look around while we show you that good design doesn't have to be expensive.


Meet My Mom
To you, she looks something like this.


But to me she looks a little more like this:
Hubba hubba, right?!

Writing a paragraph about my mom that appropriately captured how awesome she is turned out to be a lot more difficult than I thought it would be. Not because I couldn't easily convince you of her greatness, but because it was almost impossible to narrow it down to just one paragraph. Probably because the biggest thing that is wonderful about my mother is the littlest things...All the little efforts she puts into making every day seem not so everyday. From the family cheer we never missed a night of chanting, to the birthday present scavenger hunts, and the meticulously coordinated themed dinners, she left no opportunity to celebrate uncelebrated!  My siblings and I knew no store bought valentines, no Costco sheet cakes. She pours her heart and soul into every detail of every thing she does, and applies that same dedication to her church calling, her magazine-quality home, and now, to this blog. 

If you asked my mother what her greatest accomplishment has been, she would probably say raising her six children, made possible, of course, by another of her greatest accomplishments; landing an incredible man (and a major hunk) like my father. She is a very involved and dedicated parent, a loving wife, an adoring grandmother, and an amazing friend...slash therapist. Though she was California-born, and is Boise Idaho dwellin', she is a lifelong Dallas Cowboys fanatic, who even had a game dedicated to her on her birthday as a child. She spent many years actively involved with Stampin' Up, even being ranked in the top ten demonstrators in the nation! Known far and wide for her utterly perfect handwriting (seriously ask anyone!), my mother is often told it should be made into a computer font. If they ever come out with a font called "Colleen", it is going to be the most downloaded one on the internet. Less well known of her talents is her almost frighteningly dead-on impersonation of the Wicked Witch of the West. Graced with it at only the most rare and humorous of occasions, we are always shocked and amused at just how misplaced it sounds coming from my dear sweet mother. Whether it was silly impressions, family "leaf races" in the Boise river, or dangerously competitive late-night SNORT marathons (a favorite card game in my family), my mother showed us all a childhood full of unconditional love, uncontrollable laughter, and unforgettable memories.


Still in love after all these years (I told you he was handsome!)

My mother has been my main source of aesthetic inspiration my entire life. From raising me in a perfectly put together home, to teaching me how to put on mascara for the first time, she has equipped me with so many tools that I still use today. My mom taught me everything I know about all things lovely-although she clearly hasn't taught me everything SHE knows yet. I am continually baffled by the beautiful things she comes up with, and the beauty she emanates in every aspect of her life. 


This is my beautiful daughter Brianna


But to me, she will always be my little Nani

Typically dressed from head to toe in outfits that were often an assault to the eyes, Brianna found ways to express her creativity at a very young age. Her now perfectly coiffed hair was then often matted, tangled, and speckled with grass, but as it is with most creative geniuses, she didn't care one bit. She was too busy creating masterpieces out of macaroni and glue. She always loved to paint, to draw, and to adorn anything that wasn't moving (and some things that tried), and she was naturally good at all of it.

Brianna first showed sparks of design genius when she adorned her beloved bike with dangling pine-cones, bells, streamers, soda pop cans and Beanie Babies. Beads lined the spokes of her tires so you could hear her coming from a block away. The memory still brings a smile to my face. Brianna has always had a look and style all her own and was never afraid to be herself. This talent is evident in her home where she mixes current trends with eclectic elements, thrift store junk turned to gems and fearlessly creates a space that screams Brianna (the stylish, cool, on-trend Brianna of now, thankfully....though there may still be a pine-cone or two). We believe your home should be a reflection of you; pine-cones and all!

By day Brianna is a talented beautician with mad nail art skills (think hand-drawn zebra print nails that look manufactured they’re so perfect), but by night, she can typically be found sprucing up her 70 year old fixer-upper rental and snuggling with the love of her life, my grand-dog Macy (yes, grand-dog is a word, cuz I made it one). While Brianna is obviously physically beautiful, I’m here to tell you that her beauty runs much deeper. She is kind, compassionate, loves to give thoughtful gifts to others, and has a soft spot for elderly people (she spends 2 work days a week doing hair in a nursing home and loves her blue haired buddies). Aside from all that sappy stuff, she has a wicked sense of humor, is a pun war aficionado, and a true Harry Potter nerd. 


Baby's third Christmas
From her impeccable style of dress, to her innate ability to spot a thrift store treasure, she puts style in all she does. Brianna brings a younger, edgier vibe to our blog and her unique perspective on how to decorate and fix up a rental without investing much money will bring a much needed view point to the DIY blogging world. With her on board expect to see an occasional fashion, beauty or hair post pop up now and then just to keep you on your toes and looking fine! Ow! Ow!

Our Perspectives:

I’m Colleen, and I’m the boss Mom of this operation. Being a mom and creating a beautiful home for my family to gather in are two of the most important things in the world to me. Our homes are a reflection of who we are and since I am not perfect, let me assure you, neither is my home. However, a home doesn't have to be perfect to be beautiful! In addition, let me assure you that bringing style to your home doesn't have to break the bank! As a stay at home mom with 6 children, expensive design and having nice things was not going to happen on our budget. If I was going to have that beautiful, welcoming home I dreamed of, I was going to have to make it happen on a tight budget. And so I did. I learned to shop my own home (continue reading our blog and we’ll teach you just how to do this), shop garage sales, discover the art of shopping thrift stores (I assure you, there are tricks and we will teach you) or when all else failed, I made it myself (or sweet talked my stud of a husband into doing it for me). It can be done and my home is proof! I’m humbly appreciative every time a new friend or visitor walks into our home and says, “Wow! Your home looks like it could be in a magazine!” I assure you, every single room has been done on the cheap. As in dirt cheap. 

My design aesthetic is a bit different than Bri’s and it’s that contrast between our ages and styles that brings so much to the table here at Like Mother Like Daughter. While there are many basic principles and techniques that I have passed down and many others that we have discovered together, the one thing I hope to have really passed on to Brianna is the courage to be herself and to make her home her very own. She has done just that and boy, is it beautiful! I can’t wait for you to see!

My home is a mix of traditional and modern with a little cottage chic thrown in. I love the contrast of beautiful, sleek elements combined with rustic, natural or weathered pieces. My style is constantly evolving, but always relies on the same basic design elements and frugal habits that I have honed over 25 years. So stick around so we can share what has been passed down.......from Mother, to Daughter and now to you!


You know the expression "use what your momma gave you?" Well, that's how the idea for our blog came to be. I'm Brianna, the "daughter" half of Like Mother Like Daughter, and while what my mother gave me, I might not be able to "shake" (trust me, you wouldn't want me to try), she gave me something much more valuable; a keen eye for style, a love for creating a beautiful home, and the knowledge and tools necessary to do so on a budget. I grew up in a home where every room had its own distinctive and cohesive decor. So as I started growing up and preparing to leave the nest, it seemed out of the question that my home be any other way. In preparation, I began drooling with my mother over her home decor magazines, taking interior design courses through high school, and mentally planning down to the smallest detail my own future  home. This is where my mother's thrifty tips have saved me over the years on my own.  Being a self-employed twenty four (and a half!) year old renter, I have to find a way to have my "Pottery Barn" home on a lives-in-a-barn budget.

When you rent a home, compromise is the name of the game. You have to work within the boundaries of the lease, meaning you can't always make the changes you would make if the space were your own, which unfortunately sometimes means embracing that outdated wall paper, or the bright pink ceiling (seriously...who paints a kitchen ceiling pink? It was pepto abysmal!). You have to share your space with roommates, which can also mean incorporating that horrible plaid couch that never did quite find its way out to the curb. Being on my third rental, I have pretty much mastered compromise. In my upcoming posts, I will be teaching you tricks I've picked up along the way to making these little compromises work for you, and how to work with the space you have (or in my case, don't have!). I will also be teaching you ways to make improvements to your home that aren't permanent, and can easily be moved or put back to normal when it comes time to move out.

I have always thought of my home as a kind of optimistic self portrait; each room its own reflection of me, scattered with clues to figuring out just who I am as a person (leaving out most of the bad stuff, of course). My home is very personal to me, afterall, it is where I go to just be myself. It is where I relax, where my friends gather, and where my sweet, four legged best friend waits all day for me to get home to smother me in affection. There is so much love that abides here, so many positive memories that have been made within these walls. It only makes sense to put that same love back into my wonderful home. With each project I complete it feels so much more "invested in," and becomes a bigger part of me as I put more of myself into it.  Never having a surplus of money at any given time, I have learned to pick things up here and there. Therefore, my home is an ever-evolving project, changing with each little purchase I make, each project I complete, and growing with me as a person. Since I have learned to score most of my finds at thrift stores, craigslist, and on clearance racks, having a home that feels like home seems much more manageable one throw pillow or re-purposed treasure at a time. Being the thrift store addict that I am, I have learned to look at things as what they could be, as opposed to what they are, and will be sharing with you tips on how to do the same.


So stick around so we can pass along our passion for a beautiful home; from mother, to daughter, to you.

Sunday, January 12, 2014

Mid-April Reveal (insert squeal of delight)!

Hello friends!

Remember us? We just wanted to remind you that this blog will officially go live mid-April and was created from the beginning as a temporary spot where we would only share a few blog posts while waiting for the "real" blog to be designed and running. It is taking a bit longer than we thought (as in months longer :) ) but some big life events delayed us and now we are almost there! We want it to be perfect for you! We have SO many things we can't wait to share with you, so stay tuned loves for the big reveal and then regularly scheduled posts coming mid-April. 

You won't want to miss it so be sure to subscribe by email!

We look forward to building an online community and place to share our creative ideas and inspiration for creating a beautiful home on a budget, because we believe that good design doesn't have to be expensive.

Saturday, December 14, 2013

Allover Wall Stenciling


In a recent bout of ambition that I would later question to be temporary insanity, I decided to try my hand at wall stenciling for the first time. I have a small half bath that I have been remodeling very slowly, since I moved in a year ago. It needed some excitement and the room seemed like just the spot for such a bold and vibrant statement, and happened to have a wall that was the perfect size and texture for a first attempt at stenciling. I felt fairly confident and set off to work on what I was sure would be the perfect project to complete on one of my elusive days off. I really got the rug (or should I say bathmat) pulled out from under me there! It turned out to be a much more time consuming, tedious, and at times downright excruciating project than I had imagined. I laughed, I cried, I painted, I repainted, swore off stenciling for life, probably cried some more, and finally ended up with something that somehow made me forget all the hours I spent cursing myself for not just buying wallpaper. I fall in love with it every time I walk in the room. And best of all, I get to look at it and know I did it myself. As I'd like to think, I learned 500 ways not to stencil a wall. It took me most of the project to perfect my technique, but it could have been much simpler and less time-consuming if I knew then what I know now. This is information that would have really come in handy for me many hours and temper tantrums ago. I would like to pass it on to hopefully make things just a little bit easier for those of  you who might want to give it a try- I promise you it will be worth it!

You will need:
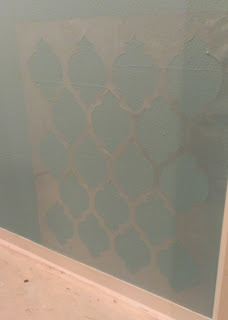
- Stencil of your choice. For my wall, I chose the Casablanca allover wall stencil from cutting edge stencils. This particular stencil included a large allover stencil and two smaller stencils for gaps and edge work (depicted below).
- Interior latex or acrylic paint in the color(s) of your choosing.
- Dense foam roller (I started out using a standard sized paint roller, but after some trial and error, found it was much easier to use a mini foam roller)
-Small, easily controlled paint brushes for touch ups
-Paint tray (or a plate works, if using a mini roller)
-Painters tape
-Low tack spray adhesive (I used Loctite General Performance Spray adhesive)
-Stepping stool
-Punching bag

-Oh and the instructions say you will also need a stencil level, which was said to be included. I'm sure it was. I'm sure knowing me I just lost it, but for whatever reason, I know nothing of this stencil level. Alas! I never even needed it.
Casablanca Allover Wall Stencil from Cutting Edge Stencils

You will want to pick a time that you have the majority of a day to devote to your project. While stenciling seems like a fairly easy process, it can be very tedious, and time consuming. I would HIGHLY recommend doing this on a day where you can be sure to get at least all of the full panels of the stencil up, and not have to stop half way through using it. The adhesive is very difficult to remove, so you will want to try to avoid having to clean the stencil until you are completely through with it. If you run out of time (or steam!) and need to save the edge work, or touch-ups for another day, it is much easier to pick up from there than to try to store your sticky stencil or attempt to clean the adhesive off and start back up later. Not to mention if you are unable to remove ALL of the adhesive, it can leave the back of the stencil slightly uneven, and more likely to bleed, making it much more difficult when you come back to it (could i be speaking from experience?!)
Preparation:
First, you will need a game plan! Visualize your desired finished product, and the overall style you would like to achieve.  Decide if you are wanting it to be a  subtle pattern repeated throughout the room, for example, or a bold colorful design on an accent wall or at a focal point in the room. Based on that, decide which wall(s) you will be working with. Smooth, texture-free walls are ideal to ensure the stencil lays flat and minimal bleeding occurs . Select a stencil that fits the style of the room. I was unable to find allover wall stencils anywhere in town, so you may end up having to order yours online as well. Using the free samples provided at any home improvement store, carefully select colors that compliment one another and the rest of the room.

Fill any nail holes or chips in the wall, so you have a smooth surface to work with, then if you are repainting the base color on the wall, select which color you want to use first (depicted by the positive space on the stencil). I would recommend using the darker color as the background if you are undecided on the order of the two. Then when you have to go through and do touch ups (which if you are as skilled as I was, you WILL), you will have a much easier time covering mistakes. I used the lighter of the two colors first, so when I went over the wall to fix the bleed marks, the touch ups often needed two coats in order to cover the dark. Which was double the work!
Tape the selected wall(s) off with painters tape for clean lines, and after painting, make sure you allow at least 24 hours to fully dry before stenciling. Make sure that you know which color needs to be used first to work with the stencil.

Stenciling:

Once the base coat is dry it is time to start the actual stenciling. Make sure that you are working with a completely clean and dry surface before beginning. Take the stencil in the garage, or outside away from dirt and wind. Lay it on a clean flat surface that you don't mind if it gets very sticky (I used a big flat board I had in my shed). Coat lightly with a low tack spray adhesive*, spraying in short horizontal bursts, as you would coats of spray paint. Use enough to make it noticibly tacky, but not drenched, and give it a minute or two to dry before making contact with the wall so as to not damage the paint underneath. Choose the least conspicuous corner of the wall for your first panel, to ensure you get the hang of things by the time you work your way to more visible parts of the wall. I started in the bottom right-hand corner of the room.
*The instructions that came with the stencil stated that the spray adhesive was optional, and painters tape alone could be used.  For all I know, this may be true, as I did not opt to even try it without it. However, having spent as much time on the project as I did, I was able to really get a feel for things, and I can't imagine trying to work without it.


Line the corner of the stencil with the corner of the wall, and very slowly and carefully lay the stencil down smooth on the wall, making sure there are no bubbles or wrinkles. Be sure that the stencil aligns as perfectly with both of the walls in the corner as possible. I guess this is where the stencil level would have come in! Run your hand or a dry unused paint roller over the stencil, applying enough pressure to ensure that the adhesive is secure to the wall. Tape the edges of the stencil down with painters tape for additional hold if desired. I only found that to be necessary as a lot of adhesive built up on the stencil, or on tricky corner pieces.
Once the stencil is in place, pour a small amount of paint into your tray, and roll your roller in the paint so that it absorbs most of it. Then, using the flat part of the roller tray, roll as much of the excess paint as you can off of the roller. You may even want to roll it once or twice over a folded paper towel to blot the majority of the paint out, and then blot some more! It is almost impossible to have too little paint on the roller. It is much better to do multiple very thin coats than to saturate your roller. You spend much more time on touch ups than you would have spent had you just been patient and sparing in your coats, and you achieve a much cleaner result.
 Having excess paint will cause paint to seep between the stencil and the wall, creating bleed marks (hmmm...experience again?)


Use very little pressure when applying your coats, as pushing too hard can also cause seepage.  No need to allow each thin coat to dry fully, a minute or two between coats is sufficient. I found it worked best to then immediately remove the stencil from the wall when the last coat had freshly been applied and  let the wall and stencil dry separately for a little while before starting the next panel. Allowing them to dry together sometimes caused peeling of paint and imperfect edges when the stencil was lifted away from the wall.
The instructions state that if you would like to check your progress, you can peel your stencil away from the wall, then lay it flat after you have taken a look. I would not recommend this. Shifting the stencil too much allows room for error and risks paint getting on the back of the stencil, and therefore applied to the wall when it is laid back down.  When the first panel has dried enough that you can move on without compromising your work, you can move on to the next.

The wonderful thing about the damask (allover) stencils is that they are designed so that each panel can lock in with the last, so you can overlap and ensure that the patterns line up perfectly. Just be sure to try to avoid re painting over the shapes which overlap. You should not need to reapply the adhesive with each movement of the panel, especially if you are also re-enforcing the stencil with painters tape, and if you are following the two most important rules: Very little pressure, even less paint. When the stencil does start to lose its tack, you can respray it (always on the same side), still using very light coats. Continue to repeat the stencil until the surface of the wall is covered, making sure that each stencil repeat lines up perfectly with the last (and with the walls, when doing panels adjacent to a wall, the floor, or ceiling), so that the stencil can continue to remain level and maintain its consistency.


When I got close to the edges of the wall and didn't have enough room for another full panel, I overlapped the stencil as far as I could without having to bend it. 

At this point, you really only have the gaps to fill in around the edges, top and bottom.


For the bottom, I used the stencil included for finishing the top and bottom. I simply aligned it with the existing design, and taped it off where I wanted it to stop, to ensure clean lines. 


Around the sides, I found it easiest to just align the stencil with the rest of the pattern, bending it slightly just along the edges to completely cover the remainder of the wall, but overlapping as little as possible. Be sure to keep the walls you aren't planning on stenciling taped off at all times to avoid clean ups later. The best way I found to ensure crisp lines when filling in the corners is to line up the stencil and bend (but not crease) it at the seam of the wall. Then tape again over the stencil to hold it in place and solidify that line, so that you don't get paint on the other wall. For the corner pieces, it was easiest to use a small brush instead of the roller. Foam brushes work well because it is better to dab the paint on than to brush it. Using a regular paint brush also works, just use the end of the bristles and apply the paint in a dabbing motion. Remember to continue to use very little paint on the brush! It is especially easy to bleed on the corner pieces because the thick plastic stencil does not bend easily, therefore does not lay flush with the corner. 


Once you are finished stenciling, all you have left to do is the touch ups. If things went well, there should be very few. If you took a while to find your stride, like I did, this might take a little longer (not to mention the fact that I am an insufferable perfectionist). Step back and look at the wall before you start. Most of the minor imperfections you see when working up close are no longer visible. There is no need to kill yourself spending countless hours retracing each and every shape (remember when I said I was insufferable...yeah.). Use a very small, flat paint brush to fix any spots where the paint may have visibly bled outside of the shape.


When you are finished, peel off any remaining tape and step back to admire your work, and basque in your well-earned satisfaction. 

Once the wall is completely dry you are then free to add personal touches. Hang (or re-hang) any wall fixtures or decor. I am still in the remodeling stages in my bathroom, so I will be moving things around, but I quickly arranged this small vignette to show a (somewhat) finished product. 
Stay tuned for the photographs of the bathroom once the remodel is completed!


Last look at the overall finished product.
Due to the extremely small size of the room,  most of the pictures had to be taken from outside of the bathroom, so I apologize for the limited view. Please excuse the picture quality, as the camera used for these shots was not a high quality (aka: I didn't borrow my moms).


Cleaning:
When it is time to clean your stencil, I found it best to lay it flat in the bathtub and run warm, soapy water over it. After letting it sit for a few minutes the paint will just wipe away. You might even want to do this during the process of stenciling if it starts to accumulate a thick layer of paint that might compromise your work after multiple repeats. Do not try to remove the spray adhesive until you are completely done with the stencil. I promise you! Doing so will cause so much unnecessary grief and actually end up being counter productive and making finishing the project so much more difficult and messy. When you are completely done with it, you can try to remove the adhesive to make storage cleaner and easier. One way I found to do it was to leave it soaking in the bathtub after cleaning out the paint until the water got completely cold (warm water just makes the adhesive tacky and is virtually ineffective, not to mention incredibly frustrating), and leaned over the tub, scraping the adhesive off with my thumb nail. This did take a fair amount of time. So, if you don't have the patience (or the fingernails!) to remove the adhesive this way, a small can of Goof Off worked wonders for me! And at only $2.97 at Home Depot, it was well worth the investment. It is a professional strength remover, and a very harsh chemical, therefore requires a little bit of caution when using. Always wear work gloves (it will eat through latex gloves, so use something a little heavier) and don't work on a finished surface, such as a table or countertop, as it will ruin the finish. Leaning over the empty bathtub worked great. Pour small amounts of Goof off at a time onto an old dish rag or towel, and wipe over the adhesive. It comes off fairly easy, with minimal scrubbing. When the adhesive starts to build up on that area of the towel, simply wet a new area and continue working until you have removed all of the adhesive from the back of the stencil. When you are finished, store flat if possible, using large drawers if you have them, or you can sandwich it between two pieces of cardboard, and under a bed. For me, it was easiest and most out of the way to tape it to the underneath side of a large shelf I have in a utility closet, so I don't have to worry about it getting damaged. 


We linked up to The Turquoise Home Work It Wednesday party and Home Stories A To Z